Home » Operating System » Windows
Category Archives: Windows
How to Fix Windows and Linux Showing Different Times When Dual Booting
source: https://www.howtogeek.com/323390/how-to-fix-windows-and-linux-showing-different-times-when-dual-booting/
Make Linux Use Local Time
Making Linux use local time the same way Windows does is probably the best option. Windows does have a registry setting that forces it to store the time as UTC, but it reportedly isn’t well supported and can cause problems with some third-party applications that always assume the hardware clock is in local time. It’s also incompatible with Windows’ own Internet time-syncing service.
The steps to make your Linux system use local time can vary from Linux distribution to Linux distribution. However, on any Linux distribution with systemd, you can use the timedatectl command to make this change. This will work on modern versions of Ubuntu, Fedora, Red Hat, Debian, Mint, and other Linux distributions that use systemd.
To make this change, first open a Terminal window on your Linux system. Run the following command to put the real time clock on the motherboard into local time. Linux will store the time in local time, just like Windows does.
timedatectl set-local-rtc 1 --adjust-system-clock

To check your current settings, run:
timedatectl
If you see “RTC in local TZ: yes”, Linux is set to use the local time zone instead of UTC. The command warns you that this mode is not fully supported and can cause some problems when changing between time zones and with daylight savings time. However, this mode is probably better supported than the UTC option in Windows. If you dual-boot with Windows, Windows will handle daylight savings time for you.

If you ever want to undo this change, run the following command:
timedatectl set-local-rtc 0 --adjust-system-clock

How to set up working X11 forwarding on WSL2
First: See and Install
Then:
Add the following to your ~/.bashrc:
export DISPLAY=$(awk '/nameserver / {print $2; exit}' /etc/resolv.conf 2>/dev/null):0
export LIBGL_ALWAYS_INDIRECT=1
Enable Public Access on your X11 server for Windows.*
Add a separate inbound rule for TCP port 6000 to the windows firewall in order to allow WSL access to the X server, as described by the wsl-windows-toolbar-launcher people.
Source: https://stackoverflow.com/questions/61110603/how-to-set-up-working-x11-forwarding-on-wsl2
Windows Subsystem for Linux Installation Guide for Windows 10
source: https://docs.microsoft.com/en-us/windows/wsl/install-win10
Tutorial: https://youtu.be/47ksZLEDLFE
Install the Windows Subsystem for Linux
Before installing any Linux distros for WSL, you must ensure that the “Windows Subsystem for Linux” optional feature is enabled:
- Open PowerShell as Administrator and run:
Enable-WindowsOptionalFeature -Online -FeatureName Microsoft-Windows-Subsystem-Linux - Restart your computer when prompted.
Install your Linux Distribution of Choice
To download and install your preferred distro(s), you have three choices:
- Download and install from the Windows Store (see below)
- Download and install from the Command-Line/Script (read the manual installation instructions)
- Download and manually unpack and install (for Windows Server – instructions here)
Windows 10 Fall Creators Update and later: Install from the Microsoft Store
This section is for Windows build 16215 or later. Follow these steps to check your build.
- Open the Microsoft Store and choose your favorite Linux distribution.The following links will open the Windows store page for each distribution:
- From the distro’s page, select “Get”
Complete initialization of your distro
Now that your Linux distro is installed, you must initialize your new distro instance once, before it can be used.
How to run graphical Linux applications on Bash on Ubuntu on Windows 10
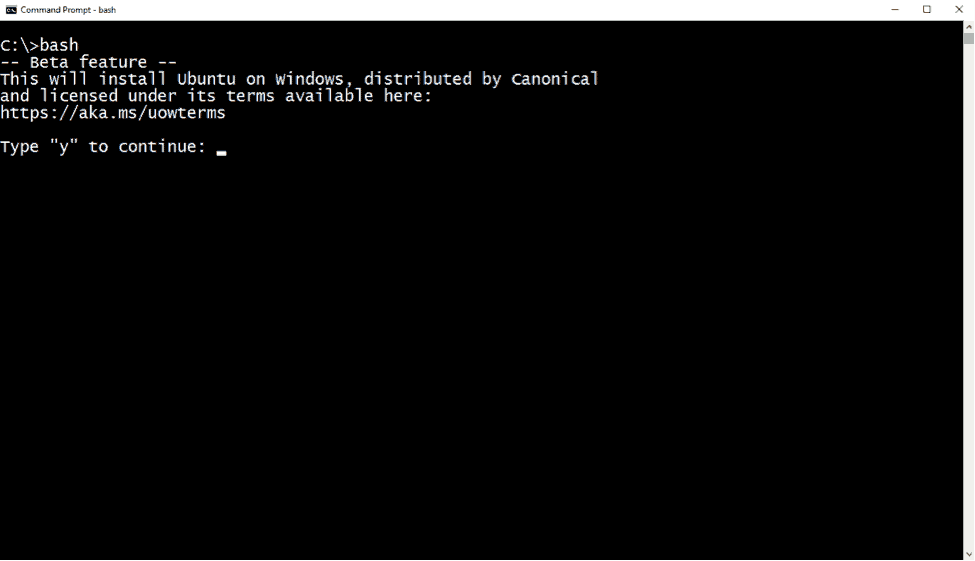
Install Bash on Ubuntu on Windows
After you have accepted the license, the Ubuntu user mode image will be downloaded, and a “Bash on Ubuntu on Windows” shortcut will be added to your Start Menu.
To launch Bash on Ubuntu Windows, either run bash at a cmd/PowerShell command prompt, or use the Start Menu shortcut.
Graphical Applications
In order to run Linux GUI applications on Bash On Ubuntu on Windows, you must:
- Install a X server for Windows
- Configure bash to tell GUIs to use the local X server
Install VcXsrv
In order to run graphical Linux applications, you’ll need an X server.
VcXsrv is the only fully open source and up-do-date native X server for windows.
- Download and run the latest installer
- Locate the VcXsrv shortcut in the Start Menu
- Right click on it
- Select More>Open file location
- Copy the VcXsrv shortcut file
- Paste the shortcut in
%appdata%\Microsoft\Windows\Start Menu\Programs\Startup - Launch VcXsrv for the first time
You may receive a prompt to allow it through your firewall. Cancel/deny this request! Otherwise, other computers on your network could access the server.
A X icon will appear in your system tray.
Configure bash to use the local X server
- In bash run:
echo "export DISPLAY=localhost:0.0" >> ~/.bashrc - To have the configuration changes take effect, restart bash, or run:
. ~/.bashrc
Test a graphical application
- Install
x11-apps
sudo apt-get install x11-apps - Run
xeyes
A new window will open, containing a pair of eyes that will follow your mouse movements.
Source:
How to run graphical Linux applications on Windows 10 using the Windows Subsystem for Linux (WSL)
Membuat User di MS Windows melalui Command Line
KMS Client Setup Keys
slmgr /ipk <setup key>
slmgr -skms
slmgr -ato
| Windows 10 Pro | W269N-WFGWX-YVC9B-4J6C9-T83GX |
| Operating system edition | KMS Client Setup Key |
|---|---|
| Windows Server 2012 R2 Server Standard | D2N9P-3P6X9-2R39C-7RTCD-MDVJX |
| Windows Server 2012 R2 Datacenter | W3GGN-FT8W3-Y4M27-J84CP-Q3VJ9 |
| Windows Server 2012 R2 Essentials | KNC87-3J2TX-XB4WP-VCPJV-M4FWM |
| Windows 7 Professional | FJ82H-XT6CR-J8D7P-XQJJ2-GPDD4 |
Source: https://docs.microsoft.com/en-us/windows-server/get-started/kmsclientkeys
